

DIY Angel Advent Calendar: Make Your Own Singing Angel Choir

Some Christmas decorations are more than just decorations. They carry memories, traditions and a little bit of family history with them.
This DIY angel advent calendar is one of those projects for me. When I was growing up, my mum made advent calendars for me and my three siblings. She put so much thought and effort into them, and we always looked forward to seeing what she had created. She would surprise us with them on the 1st of December, and some of those calendars have stayed in my memory ever since.
One that I particularly remember was her angel choir. Another year, she created an entire little city out of small white cardboard boxes, bringing it to life with LEGO figures and cars. It was absolutely epic!
Now I’m recreating my own version of the angel choir for my family, using cardboard tubes, coloured card, pipe cleaners and mini muffin cases to make 24 little singing angels.
This DIY angel advent calendar is a lovely way to bring a handmade Christmas tradition into your home. It’s a project you’ll need to prepare in advance for your children, rather than a quick craft for them to complete themselves, but the finished display is well worth the effort.
What Is a Singing Angel Choir Advent Calendar?
Instead of opening a little door or a drawer each day, this advent calendar is made up of 24 individual angels, each with its own face, hairstyle, colourful body, wings and halo.
The angels are numbered from 1 to 24, creating a little choir that grows into a festive display as Christmas approaches.
You can arrange them on a shelf, mantelpiece or another suitable surface. I made a small platform so that I can display my angels at different heights over two or three rows, with twinkly fairy lights to add a little extra Christmas magic. If you have the space, you could also have the number 24 angel hang down from the top so it is floating above the choir.
The lovely thing about this idea is that you can make each angel slightly different. Choose different colours for their robes, experiment with hairstyles and give each one its own little expression. Before long, you’ll have a whole choir of individual characters! You could even try and recreate family members for a fun twist.
What You’ll Need
To make your own singing angel choir, gather the following materials:
- 24 cardboard tubes (toilet roll tubes work well)
- Coloured card or thin cardboard for the bodies
- Coloured card or paper for the faces and hair
- 24 white mini muffin cases for the wings
- 24 pipe cleaners for the halos
- Scissors
- Glue
- A pen or pencil for tracing and drawing faces
- Sellotape
- A stapler, particularly if you’re using thick cardboard
You can use different colours for the angels’ robes and hair to create a varied choir. I used a mixture of colours for mine, but you could choose a particular colour scheme to suit your Christmas decorations.
A quick note: You’ll be making 24 angels, so it’s worth gathering and preparing your materials before you begin. Cutting the pieces in batches can make the process much quicker.
How to Make Your Angel Advent Calendar
Making 24 individual angels takes a little time, but the process is fairly straightforward once you get into a rhythm. I recommend completing the same step for all 24 angels before moving on to the next one, like a mini production line.
Step 1: Prepare the Materials
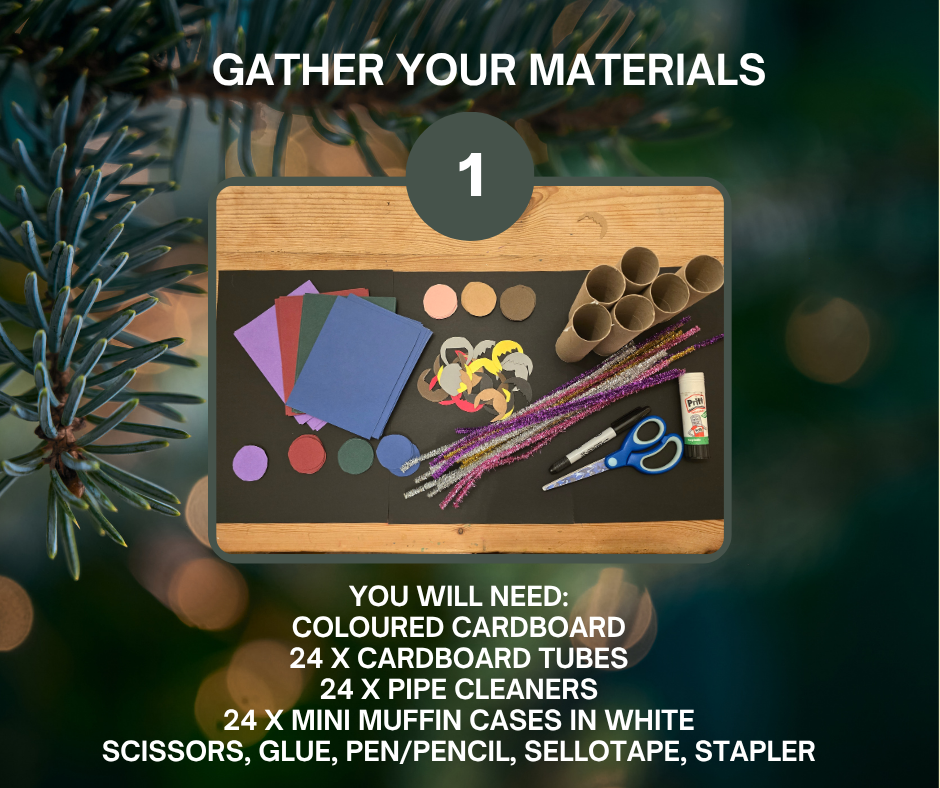
Gather all your cardboard tubes, coloured card, pipe cleaners, muffin cases and tools.
Having everything ready will make it easier to work through the different stages without having to stop and search for something halfway through.
Step 2: Cut the Card for the Bodies
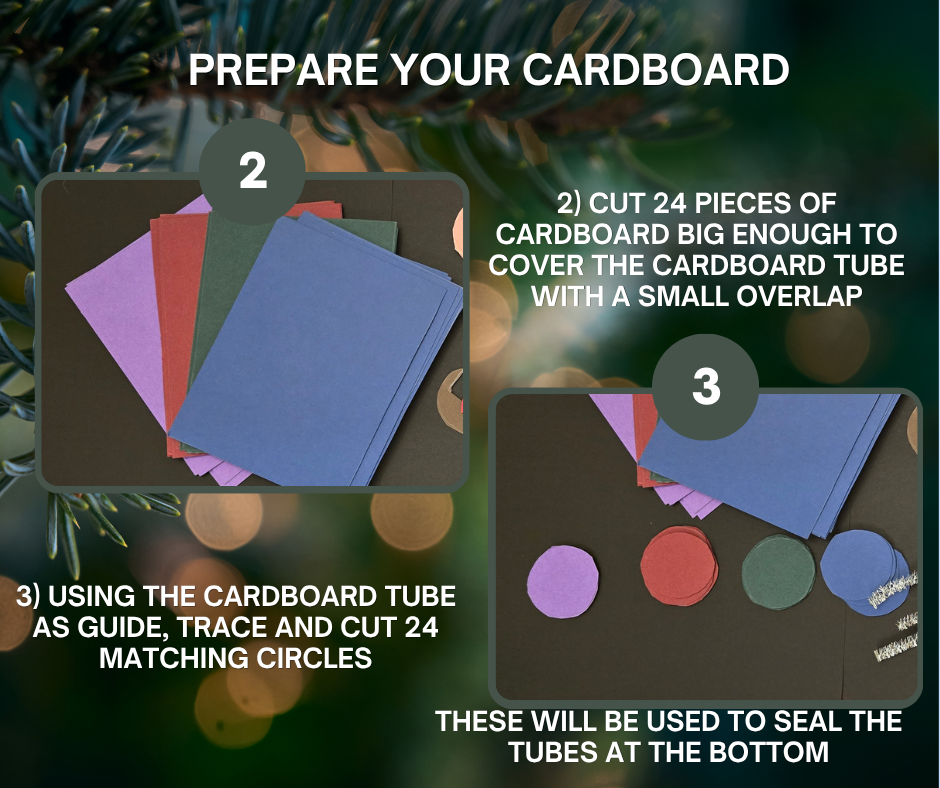
Cut 24 pieces of coloured card large enough to wrap around your cardboard tubes, leaving a small overlap where the edges meet. I found that an A4 sheet of cardboard was big enough for 4 cardboard tubes.
You can use one colour for every angel or mix things up with several different colours.
Step 3: Cut the Bottom Circles
Use the cardboard tube as a guide to trace 24 circles from your card. These will be used to seal the bottoms of the tubes.
Cut out the circles and keep them together until you’re ready to attach them.
Step 4: Make the Faces
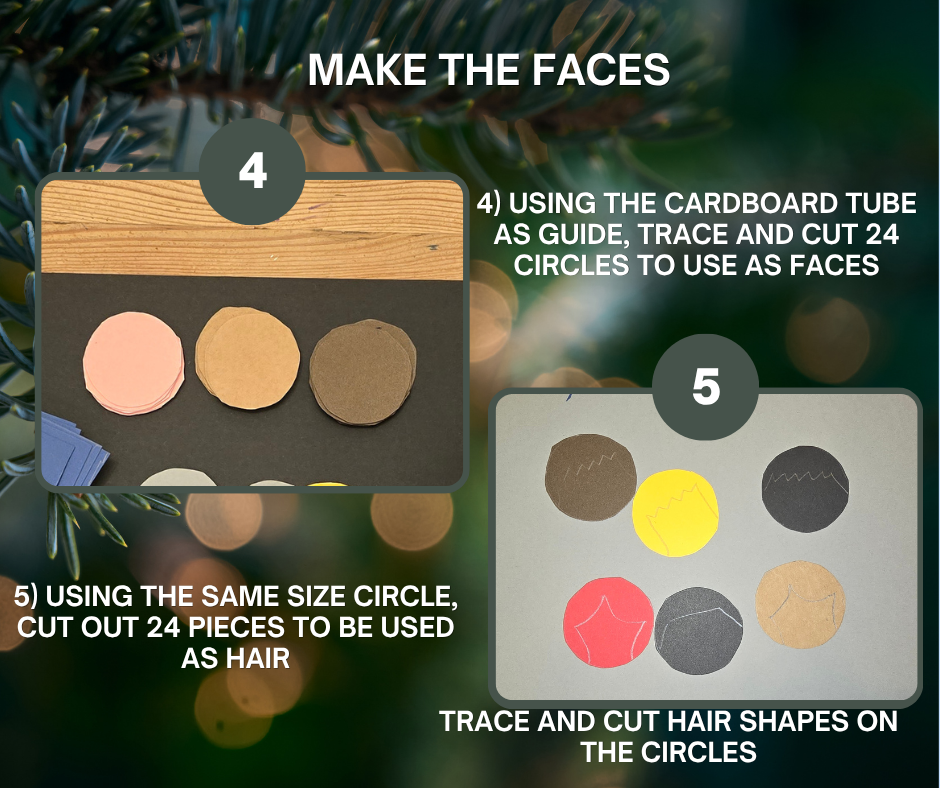
Using the cardboard tube as a guide again, trace and cut 24 circles from your chosen face-coloured card.
You can use different shades to give your choir some variety.
Step 5: Cut Out the Hair
Use the same-sized circles as your guide to cut out 24 pieces of card for the angels’ hair.
You can create different hairstyles by cutting simple fringes, rounded hairlines or more pointed shapes. Don’t worry about making every hairstyle identical — a little variety helps give your choir character.
Step 6: Assemble the Faces
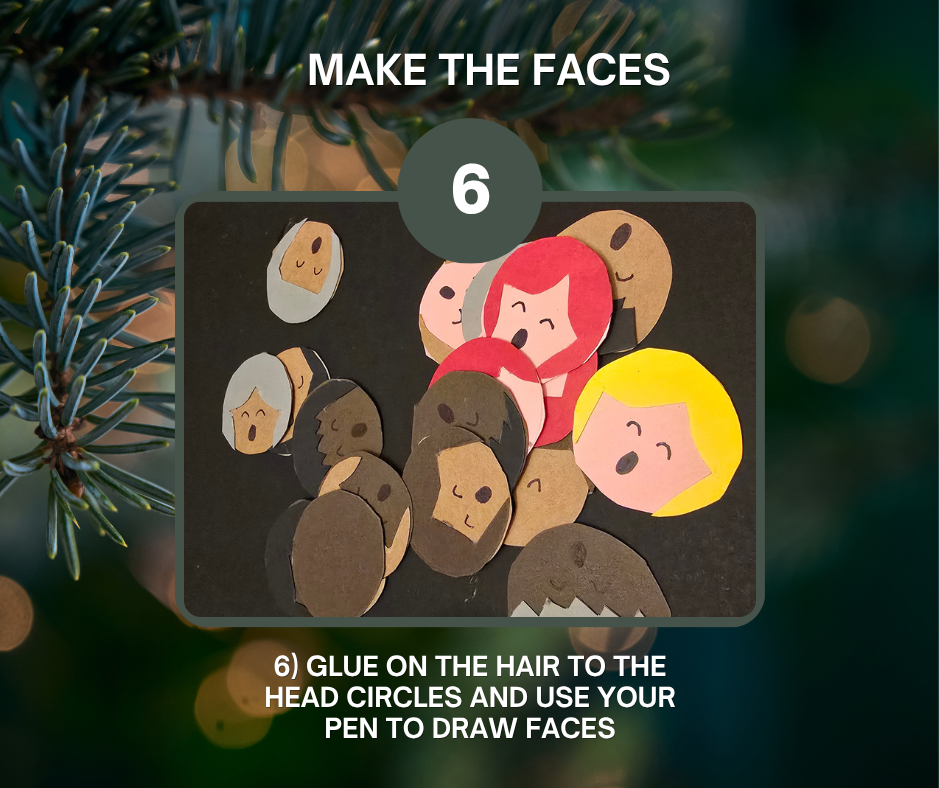
Glue the hair onto the face circles, then use a pen to draw on the eyes and mouths.
I gave my angels simple expressions, but you could make some look happy, some surprised and others as though they’re singing their hearts out!
Set the finished faces aside while you prepare the bodies.
Step 7: Cover the Cardboard Tubes
Apply glue to one side of each piece of coloured card and wrap it around a cardboard tube.
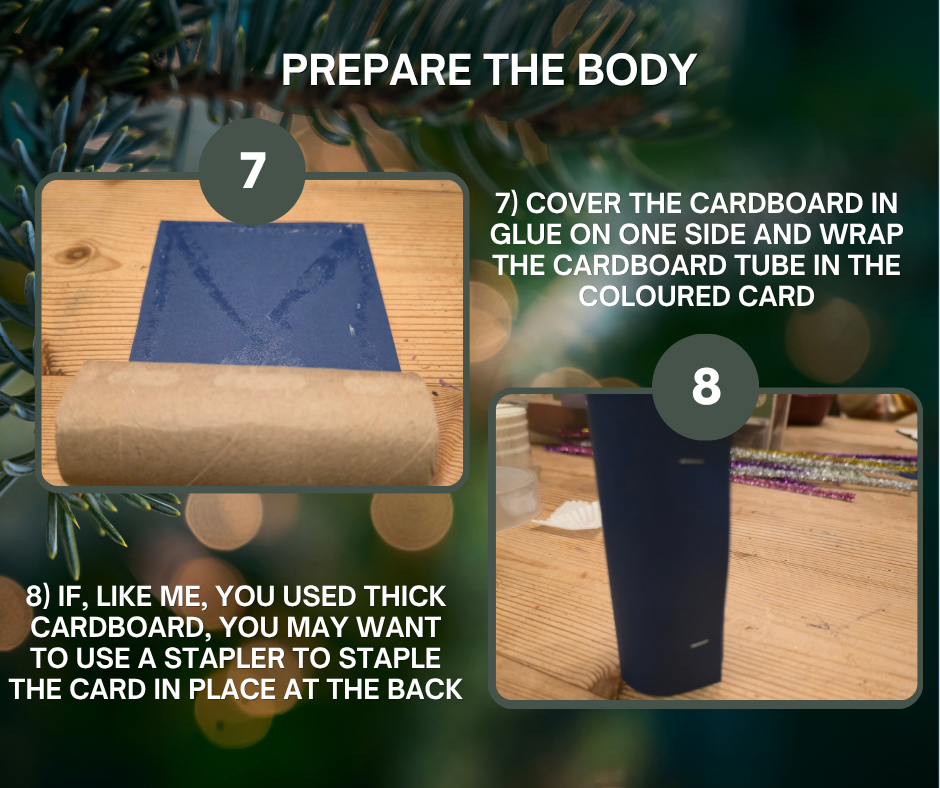
Make sure the card covers the tube, with a small overlap at the back.
Step 8: Secure the Card
If you’re using thicker cardboard, you may find that glue alone doesn’t hold the card in place while it dries.
I used a stapler to secure the overlap at the back of my tubes. You can use whichever method works best for your materials.
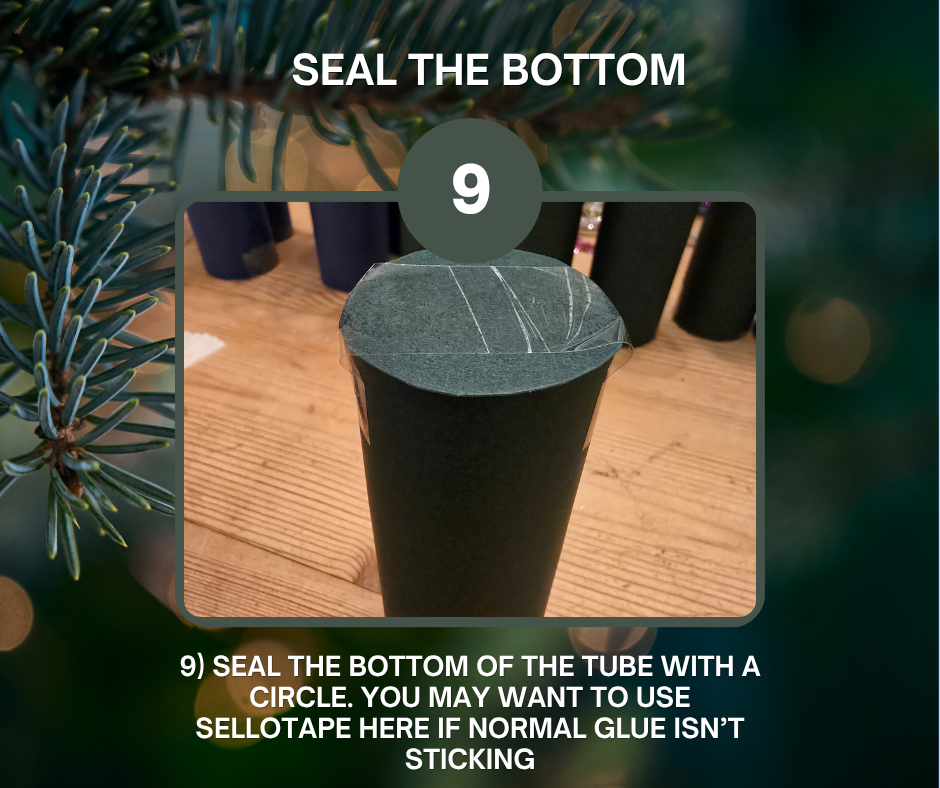
Step 9: Seal the Bottoms
Attach one of your prepared circles to the bottom of each tube to close it off.
You may find that ordinary glue doesn’t stick particularly well to some cardboard tubes, as the surface area to glue it to is very thin. If that happens, use a little Sellotape to help secure the circle in place. This is important to make sure any chocolates or sweets don’t end up falling out.
Step 10: Attach the Heads

Glue a finished face to the front of each covered tube, near the top.
Hold it in place until the glue has started to grip, then leave it to dry if necessary before continuing.
Your angels should now have their robes and faces, so it’s time to add the details that bring them to life.
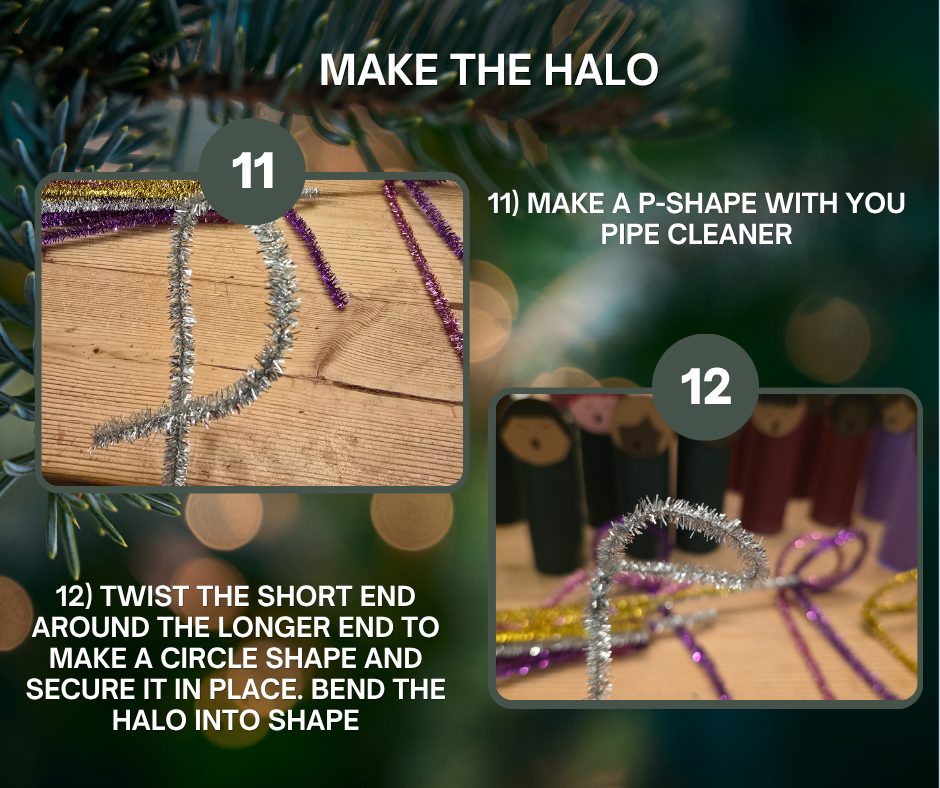
Step 11: Make the Halos
Take a pipe cleaner and bend it into a shape resembling the letter P.
This will form the basis of your angel’s halo.
Step 12: Shape the Halos
Twist the short end of the pipe cleaner around the longer section to create a closed circle, then secure it in place.
Bend the circle into a neat halo shape and leave a length of pipe cleaner below it to attach to the angel.
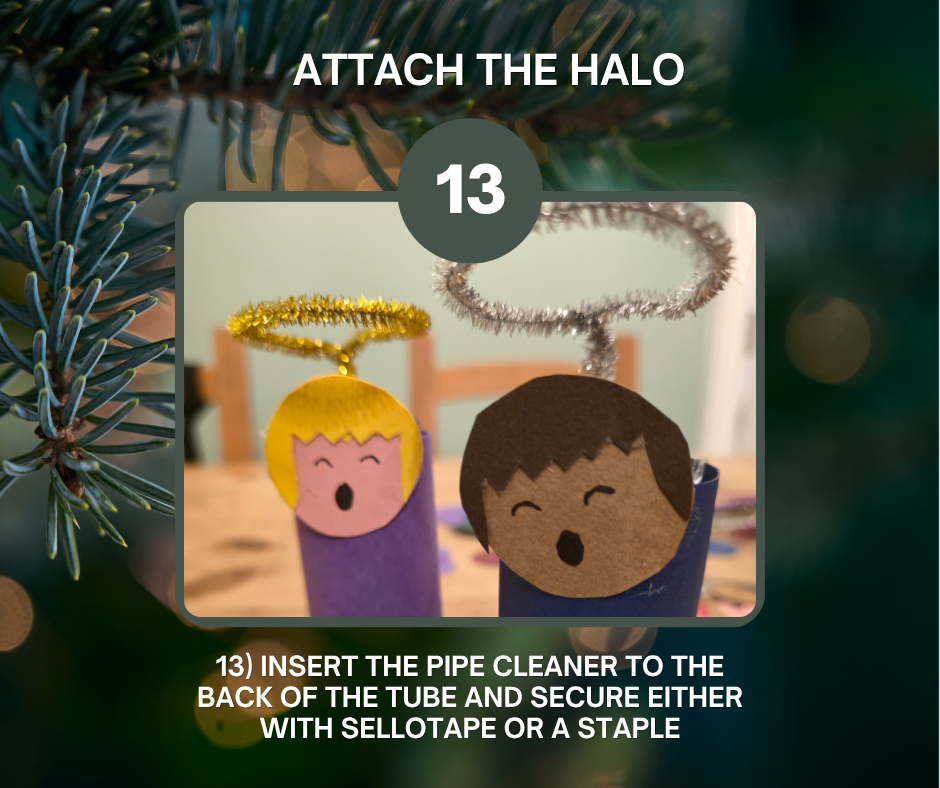
Step 13: Attach the Halos
Insert the end of the pipe cleaner into the back of the cardboard tube and secure it with Sellotape or a staple.
Adjust the halo so that it sits above the angel’s head.
Be careful when using a stapler, and make sure any sharp staple ends are folded down safely.
Step 14: Prepare the Wings
Take a white mini muffin case and fold it in half, then fold it in half again.
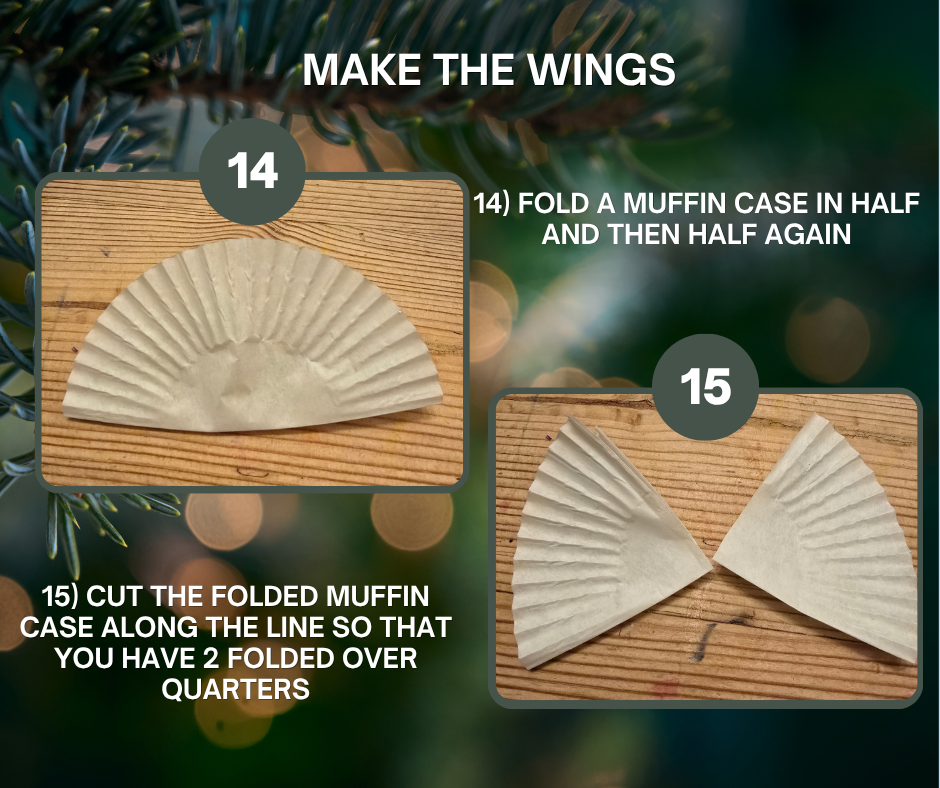
This creates a smaller folded shape that you can cut to make two wings.
Step 15: Cut Out the Wings
Cut along the folded line so that you have two folded-over quarter sections.
These will become the angel’s wings. Gently adjust the folds as needed to give them a little shape and dimension.
Step 16: Attach the Wings
Use a little Sellotape to attach the wings to the back of each angel’s body.
Position them so that they spread out on either side of the tube.
Step 17: Finish Your Angel
Your angel is now complete!
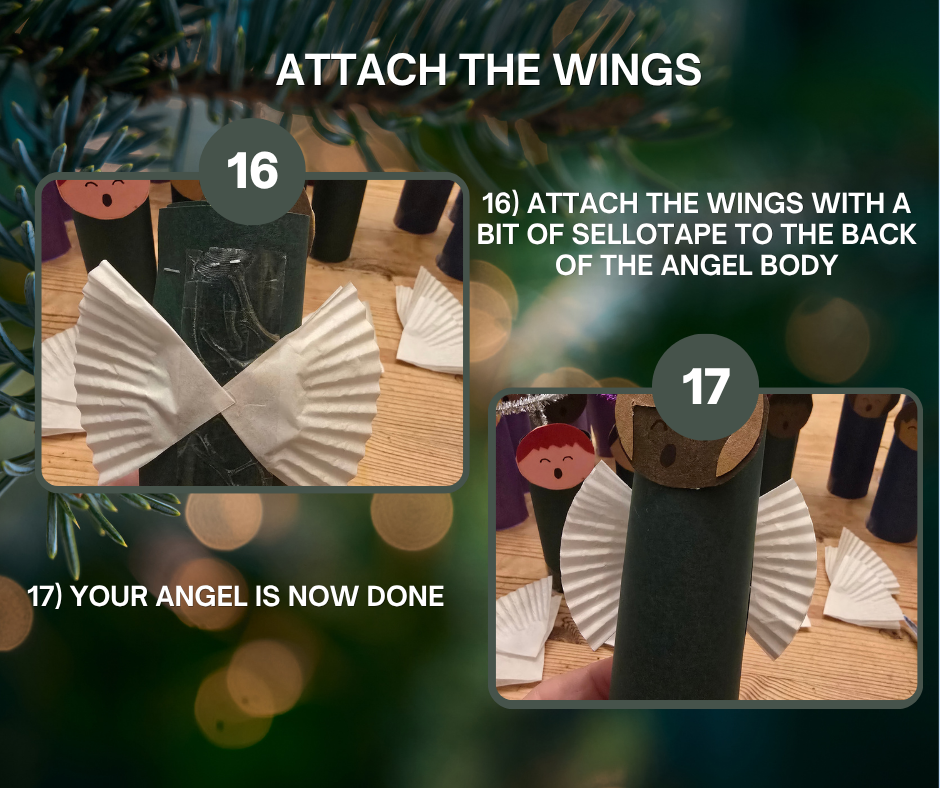
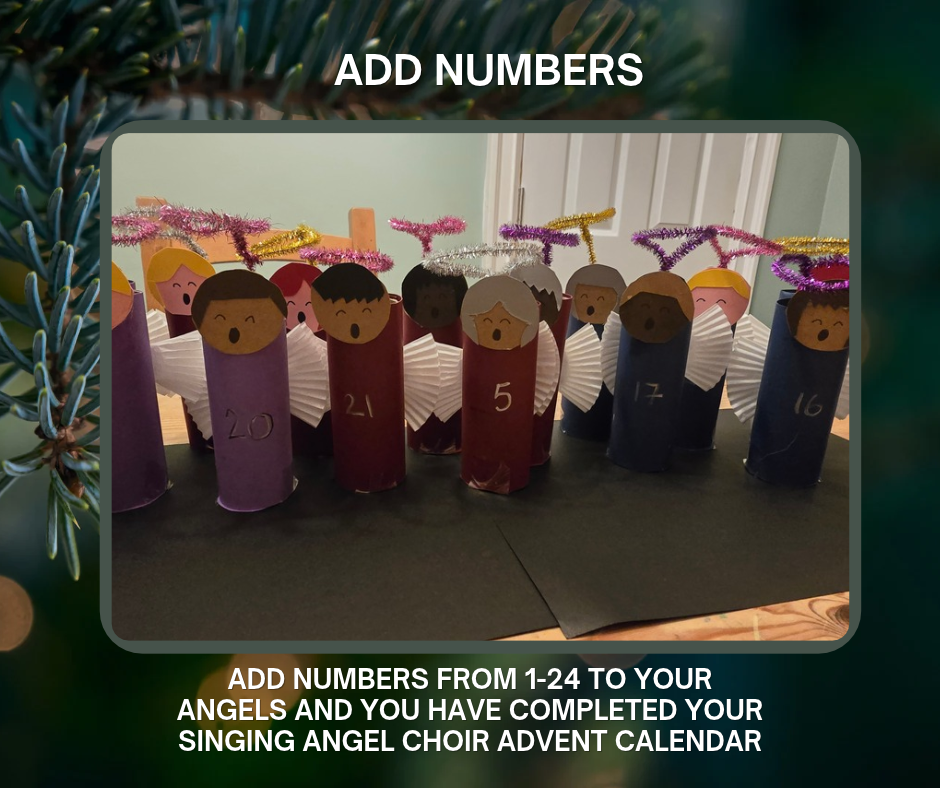
Repeat the process until you’ve made all 24 members of your choir. Once they’re assembled, add numbers from 1 to 24 to their bodies to turn them into your advent calendar.
I found it easiest to work in batches, completing the bodies first, then the faces, halos and wings. It also means you can experiment with different colour combinations as you go.
How to Display Your DIY Angel Advent Calendar
Once all 24 angels are finished, it’s time to create your display.
You can arrange them in a single row, group them together on a shelf or create a more elaborate scene with several levels.
For my version, I’ve made a small platform so I can position the angels at different heights over three rows. This makes the whole choir stand out and make the display feel a little more like a miniature stage.
I’ve also added some twinkly fairy lights for added Christmas sparkle. I think the gentle lights make the angels look particularly magical in the evenings.
If you decide to add lights, position them carefully and follow the manufacturer’s safety instructions. Keep the display away from candles, heaters and other sources of heat.
You could also add a simple background, a starry night scene or a little paper stage if you want to build on the idea. The basic angels are a lovely starting point, and you can make the display as simple or elaborate as you like.

Need more inspiration?
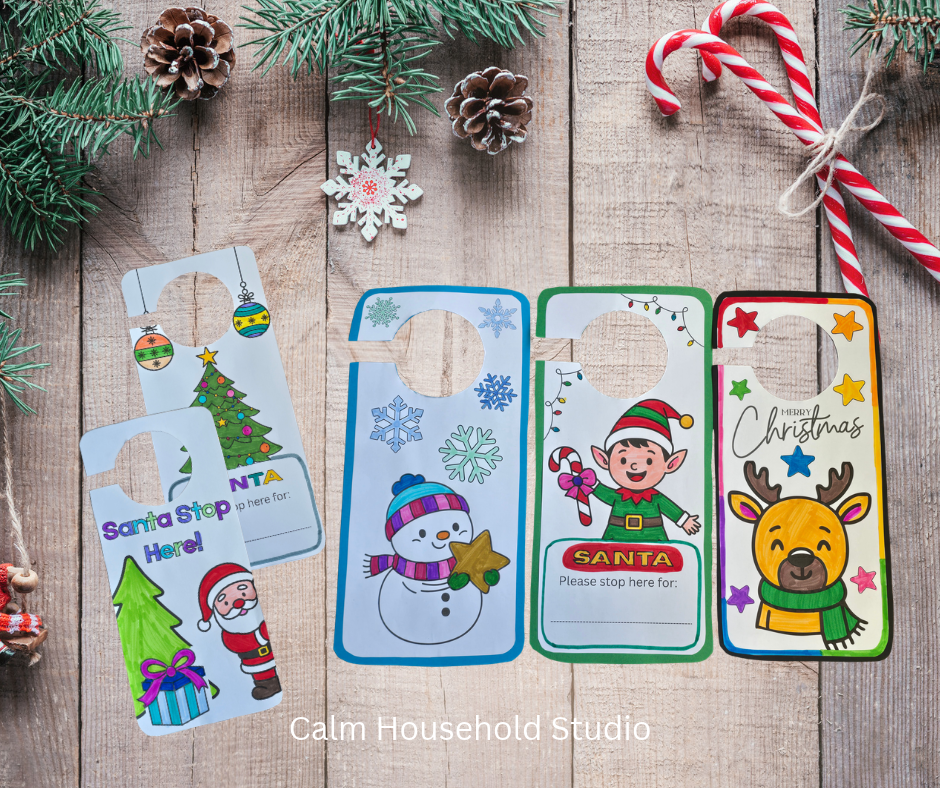
If you’re looking for more ways to add a handmade touch to your Christmas decorations, why not try some of our other festive crafts? Create a colourful Christmas Window Colour Candle Display to brighten up your windows, make your own Christmas Cards to send to friends and family, or let the children decorate their bedroom doors with our Free Printable Christmas Door Hangers. They’re all simple ways to get creative together and make your home feel a little more Christmassy!
A Handmade Christmas Tradition
One of the reasons I wanted to recreate this angel choir is that it reminds me of the advent calendars my mum made when I was little.
She didn’t just buy a calendar and put it on the table. She created something special for each of us, putting time, care and imagination into a surprise that we looked forward to every December.
I still remember the angel choir, and I can picture that incredible little city she made from white cardboard boxes, complete with LEGO figures and cars, including a window cleaner on a ladder. It was such a brilliant idea, and it’s something I’ve thought about many times over the years.
My mum is an inspiration to me for so many things and I have so many memories of all the little touches she did to make our childhood magical. This project is my own version of one of those memories. It isn’t exactly the same as my mum’s, but that’s part of the fun of family traditions: they can be recreated, adapted and passed on in new ways.
Perhaps one year I’ll attempt that little Christmas city myself!
If you’re looking for an advent calendar that’s a little different from the usual chocolate or treat-filled versions, I hope this singing angel choir inspires you to make something special for your own family.
It takes some preparation, but the result is a handmade Christmas display filled with personality and, for me, a little piece of family history.
Have you ever made a handmade advent calendar, or is there a Christmas tradition from your childhood that you’d love to recreate? I’d love to hear about it!